Handcraft type:
Materials:
- To start the sheet folded in half longitudinally, smooth fold hand and deploy again. Then, holding the upper right corner of the sheet, lay the triangle so that one of its sides coincided with the center. Next do the same action on the left side (Fig. 1).
- At the lower edge of the outline with a pencil about a quarter of the value of the width halves on each side of the sheet. Then, holding the right angle of the triangle, located on the side, wrap a sheet diagonally to form a wing. The line should extend from the top of the triangle to the intended point on the lower edge of the sheet. The same action is repeated on the left side of the blank, and then expand these folds (Fig. 2).
- Next, outline in pencil on the top of the workpiece and a small triangle wrap it on the sheet so that its tip coincides with the middle of the page (Figure 3).
- Next, you need to lay the wings on the previously planned lines t ak to the edge of closed small triangle. Gently smooth the nail or hard object fold line (Fig. 4).
- Now you need to be folded in half at the workpiece center fold line the longitudinal direction so that the wings bend lines were perfectly aligned. Again smooth. Now you need to lift the wings so that they are horizontal (Figure 5).
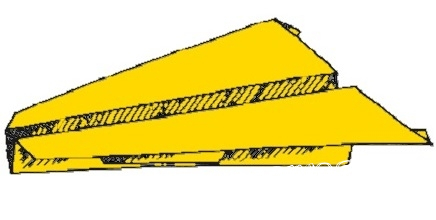
- In principle, the aircraft is ready to run (Fig. 6).
.")


